Chrome, HTML5

How Easy Is To Use A Chromebook?

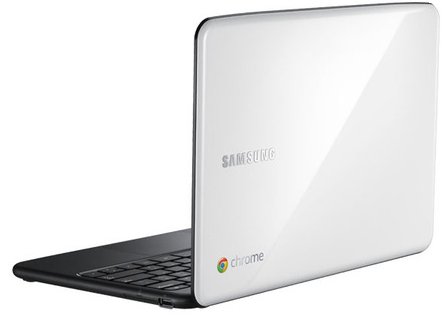
Very easy and if you are a (happy) user of gmail your life will get better from the first minute you are logged in. If you have other email service it’s also cool. I’m using both yahoo and gmail on it and it’s working great with both of them.

The ability to run gmail in offline mode is also a doable on a Chromebook. It’s very useful, specially, to people the travel a lot and can’t count that their favorite airline will have wi-fi. I’m writing this post from a Chromebook… but since wordpress don’t have a good webapp with some offline capabilities – I’m using ‘Write Space’. Write Space is a customizable full-screen text-editor that lives in your web-browser. It is designed to minimize the distractions that come between you and your writing and the offline capabilities are really working.

If you are a new to Chromebook – check this one and a half minute demo:

Standard
HTML5, webdev

HTML5 Fields – What Can You Do With It?

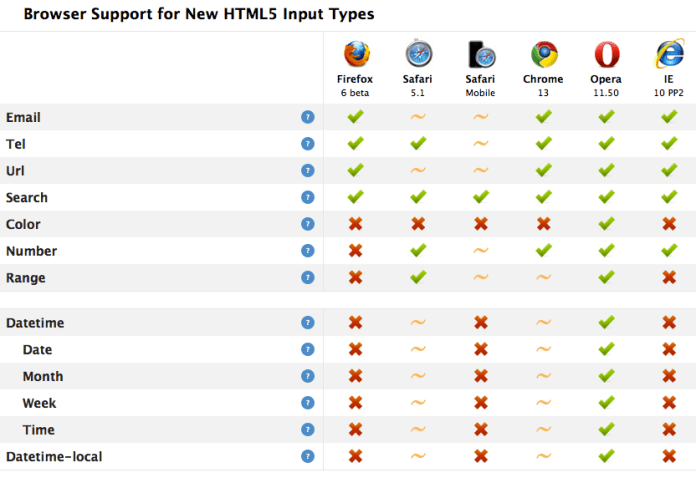
HTML5 is the newest specification for HTML, the language that web browsers read to display web pages. HTML5 has many new features intended to make creating websites easier and people’s experience in using those websites better. Among those features are many enhancements to web forms. Here is a list of the major browsers that support these days the new features:

Another place to see which browser support what type of field is http://caniuse.com/#search=input

As a web developer these improvementscan save you lots of time and effort (psss… no java script is needed to validate your fields) in order to see them live I’ve created this ‘playground for HTML5 fields’ so it will be easy to ‘play’ and see what each field is giving you. Here is a basic set to kick things:


<form>
  <fieldset>
    <label>Required</label>
    <input type="text" required />

    <label>Email</label>
    <input type="email" value="some@email.com" />

    <label>Date</label>
    <input type="date" 
     min="2010-08-14" 
     max="2011-08-14" 
     value="2010-08-14"/>

    <label>Range</label>
    <input type="range" min="0" max="50" value="10" />

    <label>Search</label>
    <input type="search" results="10" placeholder="Search..." />

    <label>Tel</label>
    <input type="tel" placeholder="(555) 555-5555" 
     pattern="^\(?\d{3}\)?[-\s]\d{3}[-\s]\d{4}.*?$" />

    <label>Color</label>
    <input type="color" placeholder="e.g. #bbbbbb" />

    <label>Number Range</label>
    <input type="number" step="1" min="-5" max="10" value="0" />
  </fieldset>
<button value="Go">Go</button>
</form>

Good luck and try the JSFiddle link if you wish to fork it and see what are the fields are doing in each case.

Standard
Chrome

Activate Your Chromebook (While You Are On The Road)

  1. Plug in your Chromebook to a power outlet. Some Chromebooks come with a detached battery or with a battery that need some juice so insert the battery and plug it in.
  2. Start your Chromebook. Power up your Chromebook by pressing the power button on the top-right corner of the keyboard.
  3. Select your language settings. On the “Let’s get started” screen that appears, select the interface language you’d like to use by default. If prompted, select a keyboard input method, too.
  4. Connect to a network. Select a Wi-Fi network from the network menu.
    (!) Please make sure you’re not connected to a network that requires web-based authentication or security certificates, in other words, no ‘term & condition’ page you need to sign on before you get connection. If you are having trouble connecting? check out this Internet connection troubleshooter to diagnose your issue.
  5. Accept terms of service. Your Chromebook will then download any available system updates so you automatically get the latest features.
  6. Sign in with your Google Account. In the sign-in box that appears, enter your Google Account username and password and click Sign in. Make sure you sign in with your primary Google Account, because this account will be set as the owner account.

In case you wish to activate Verizon, first make sure you’re in an area that is covered by the Verizon Wireless Network before beginning the activation. To check if your location is supported, visit this site. Once you’ve verified that your location is supported, follow these steps to check your signal strength:

  1. Press Ctrl+Alt+T on your Chromebook to open a terminal window.
  2. Type the following command and press Enter to see information about your modem: modem status
  3. In the information that appears, check whether the signal_strength_dbm value is greater than -86 dbm.
    If it’s not, try moving to another location with better signal strength before continuing with the activation process.

==

Enjoy you new Chromebook and check out these powerful web apps to get you going. Here are some Tricks and Tips as well.
Standard
Chrome, HTML5

New Video Channel on Chrome OS And HTML5

After speaking in seven different events (during the past two months), I’ve decided to start a YouTube channel that will focus on ChromeOS, Chromebook and (of course) HTML5.
The channel will get its own page on this blog.
and as first step, I’ll put there a series of videos (5min each) that will cover subjects around the eco system of Chrome. The first three videos are:

Other videos like This Week In Google on ChromeOS will also be there.

There are some very interesting conversations going on G+ http://plus.ly/greenido feel free to put your voice there.

Standard
Chrome, HTML5, JavaScript, webdev

HTML5 Lastest Features

This slideshow requires JavaScript.

Here are some updates and new features you can use today…

  • Page Visibility API – know when your web app’s page is not visible and save CPU (and Al gore will love you! for helping us saving earth)
  • Web Audio API – Since < audio > had its limitations. Now you can have scheduling of your playback, real-time processing and analysis of the stream and even low-level audio manipulation. Go Have Fun… It’s all in Chrome 14 stable & ready.
  • Prerendering API – speed is the need and this API comes to help.
  • Offline support is going mainstream so first you wish to know when you are online (or not) and then use IndexedDB and other options to save time and data for your clients (on the client).
  • Web graphics enhancements: Beautiful image transitions and A 3D CSS shooter
  • Native Client launched in Chrome 14 – Now you can play some classics games on your Chromebook.
    • Secure cross-platform C/C++ environment for apps/extensions
    • Close to native performance in web applications
    • Extra security, with The Sandboxed inside NaCl and Chrome sandboxes (very far from ActiveX!)
Here are some short code snippts of what you can do today on morden browsers. If you wish to check the specific feature I’ll recommend canIuse.com

Page Visibility API

document.addEventListener('visibilitychange', function(e) {
  console.log('hidden:' + document.hidden, 'state:' + document.visibilityState)
}, false);

Prerendering API

< link rel="prerender" href="http://example.org/index.html" >

Online status

if (navigator.onLine) {
  console.log('ONLINE!');
}
else {
  console.log('Connection is not *good*');
}

Now it’s your turn… start leveraging them.

Standard
Business, Chrome

Chrome Remote Desktop – Work Like A Pro

What is it?

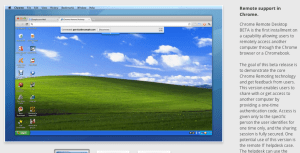
Chrome Remote Desktop BETA is the first installment on a capability allowing users to remotely access another computer through the Chrome browser or a Chromebook.
Yes! If you have install Chrome to your presents you can give them an extra support these days.

The goal of this release is to demonstrate the core Chrome Remoting technology. This version enables users to share with or get access to another computer by providing a one-time authentication code. Access is given only to the specific person the user identifies for one time only, and the sharing session is fully secured.

Chrome Remote Desktop BETA is fully cross-platform, so you can connect any two computers that have a Chrome browser, including Windows, Linux, Mac and Chromebooks.

How to share you computer? (please use with caution)

  1. Open a new tab in Google Chrome by clicking the open a new tab icon at the top of your browser window.
  2. Click the Chrome Remote Desktop icon in the Apps section to open the Chrome Remote Desktop app.
  3. Click Share this computer. The app will have permission to take the following actions:
    • See your email address
    • See your Chrome Remote Desktop computers
    • Receive and send chat messages
  4. A unique access code will be generated for each sharing session. Send this code to the person you’d like to share your computer with. For security reasons, we recommend reading this code aloud to him or her.

Once your friend enters the access code, the sharing session will begin and he or she will be able to see your computer screen.
You can click Stop sharing or press Ctrl+Alt+Esc (Mac: Shift-Esc) at anytime to end the session.

Access a macine that was shared with you

  1. Open a new tab in Google Chrome by clicking the open a new tab icon at the top of your browser window.
  2. Click the Chrome Remote Desktop icon in the Apps section to open the Chrome Remote Desktop app.
  3. Click Access a shared computer.
  4. Enter the access code provided by your friend.
  5. Click Connect.

When things are not working

I would check first the internet connection and then:
  1. Your firewall settings – Your computer’s firewall may be configured in a way that doesn’t allow Chrome Remote Desktop to work properly. Verify that your firewall permits outbound UDP traffic, permits inbound UDP responses, and allows traffic on TCP ports 443 (HTTPS) and 5222 (XMPP).
  2. Your network’s NAT Traversal policy – If your computer is on a corporate network, check whether your company’s network security policies prevent access to outside services that rely on peer-to-peer (P2P) connections (“NAT Traversal” policies). If so, you won’t be able to use the Chrome Remote Desktop app. This restriction applies when you and the other computer are not on the same corporate network.
For the ones that love to read code – This is the code that does this magic.
Standard
webdev

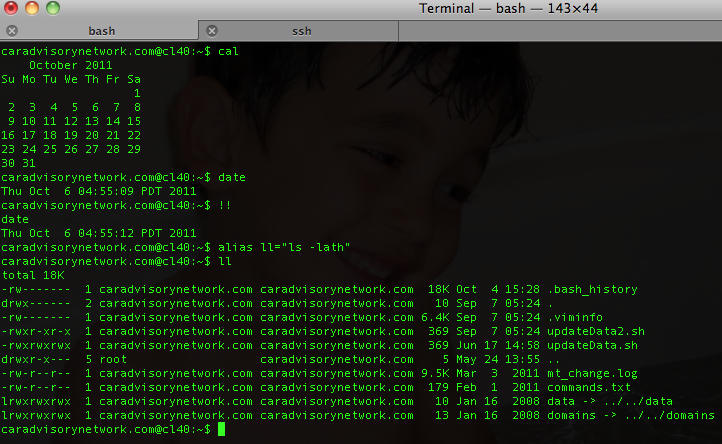
Linux Bash – Shortcuts To Boost Your Productivity


Let’s face it… in most of the cases (in the end of the day or night) you will be on a linux shell trying to hack some last minute changes to ‘production’. Ya… you know it’s something you should not do, but life is stronger than anything, no?
Here are few shortcuts to help you finish your day:

Command Editing Shortcuts

  • Ctrl + a – go to the start of the command line.
  • Ctrl + e – go to the end of the command line.
  • Ctrl + k – delete from cursor to the end of the command line – save you lots of time.
  • Ctrl + u – delete from cursor to the start of the command line, I’m not using it, but still a good one.
  • Ctrl + w – delete from cursor to start of word (i.e. delete backward one word)
  • Ctrl + y – paste word or text that was cut using one of the deletion shortcuts (such as the one above) after the cursor
  • Ctrl + xx – move between start of command line and current cursor position (and back again)
  • Alt + b – move backward one word (or go to start of word the cursor is currently on)
  • Alt + f – move forward one word (or go to end of word the cursor is currently on)
  • Alt + d – delete to end of word starting at cursor (whole word if cursor is at the beginning of word)
  • Alt + c – capitalize to end of word starting at cursor (whole word if cursor is at the beginning of word)
  • Alt + u – make uppercase from cursor to end of word
  • Alt + l – make lowercase from cursor to end of word
  • Alt + t – swap current word with previous
  • Ctrl + f – move forward one character
  • Ctrl + b – move backward one character
  • Ctrl + d – delete character under the cursor
  • Ctrl + h – delete character before the cursor
  • Ctrl + t – swap character under cursor with the previous one

Command Recall Shortcuts

  • Ctrl + r – search the history backwards
  • Ctrl + g – escape from history searching mode
  • Ctrl + p – previous command in history (i.e. walk back through the command history)
  • Ctrl + n – next command in history (i.e. walk forward through the command history)
  • Alt + . – use the last word of the previous command

Command Control Shortcuts

  • Ctrl + l – clear the screen
  • Ctrl + s – stops the output to the screen (for long running verbose command)
  • Ctrl + q – allow output to the screen (if previously stopped using command above)
  • Ctrl + c – terminate the command
  • Ctrl + z – suspend/stop the command

Bash Bang (!) Commands

Bash also has some handy features that use the ! (bang) to allow you to do some cool stuff.

  • !! – run last command
  • !blah – run the most recent command that starts with ‘blah’ (e.g. !ls)
  • !blah:p – print out the command that !blah would run (also adds it as the latest command in the command history)
  • !$ – the last word of the previous command (same as Alt + .)
  • !$:p – print out the word that !$ would substitute
  • !* – the previous command except for the last word (e.g. if you type ‘find some_file.txt /‘, then !*would give you ‘find some_file.txt‘)
  • !*:p – print out what !* would substitute
Btw, if you are Eclipse power user and with to have bash inside it:
  • Go to Menu Run/ External Tools / external  Tools
  • Click on Config (or on Mac – Add external tools) then on ‘Program’ (inside the right sidebar) and select ‘new’
  • in the Name field, type Bash
  • In location type /bin/bash
  • In argument type -s -i
  • In the common tab check ‘Allocate Console’ if it’s not
  • Click on Apply
  • Then you just have to click on the External tools icon and select ‘Bash’ – Done.
Standard
Chrome, HTML5, life, webdev

Updated Site For Projects and Presentations On ChromeOS & HTML5

I wanted to update ido-green.appspot.com since the first day of pushing it to the air… Finally, I had the time to put some new jquery-mobile (just went to RC1.0 !)  into work and have this simple location for all the talks, demos and projects. Please feel free to let me know if the colors are not making me look good.

Ido Green on Appsport

Standard
Business, Chrome

Re-Thinking Corporate IT Or How Chromebook Can Help

Few points on companies and their IT department in 2011.

  • In todays world, any CIO/CTO that want to ‘Avoid Getting In the Way’ must think on how to remove her department tag of ‘cost center’ and start pushing to be a business that save money and even produce incomes to the organization. In most of the cases the answer is ‘cloud’. But lets take a closer look what that buzzword means.
  • It’s easy to say and hard to do… However, where there are so many great clouds solutions (SAAS and PAAS) if you are still running you mail servers, your wiki or intranet site on some old hardware, something is not being done right.
  • I was lucky to be the CTO and co-founder of a great startup in the past four years (HighGearMedia) and from day one all the IT infrastructure was in the cloud. It can be Google, Rackspace, Amazon or any other provider you like and trust. The main point is saving money, time and most importantly – focus. You want to keep doing what you excel at and not spending time in supporting people with ’email’ issues or some ‘rare problems with the most important presentation. The money you save in startups is ‘nothing’ compare to the millions (or more) the large company will save.
  • One thing that the new Chromebook is doing great to the CIO and all the IT department is to allow them to mange all the organization Chromebooks from one central point. You can install apps (few clicks and ALL your users got a new chart app), remove apps and put some policy in place (e.g. no Angry birds in the middle of the day). In other words, Administrators can configure and manage Chromebooks and user accounts centrally through the web. Seamless updates directly from Google keep the operating system and software fresh (every 6 weeks you are getting a new version of chrome), eliminating the need to manually patch systems. And since only minimal data is stored on the device, you don’t need to do tedious backups or migrate data when changing hardware.
  • Last May, I’ve listened to Google CIO (Ben Fried) and his team of engineers describe how Google builds on App Engine. If you’re interested in building corp apps that run on Google’s cloud, this team has been doing exactly that. How these teams have been able to respond more quickly to business needs while reducing operational burden? Here are some answers
    If you are in NY later this month you might want to hear what Ben got to say about “Re-thinking IT: Supporting the Business Without Getting In the Way” for the upcoming Web 2.0 conference.
Standard
Chrome, HTML5, webdev

Chrome And Angry Birds

If you haven’t checked Angry Bird on Chrome  – you should 🙂 some nice special levels that are unique to Chrome. Moreover, this web app is working offline amazingly well… so you could use it over a long flight just like you playing on your mobile phone.

This is another (new – new) classic one:

[youtube http://youtu.be/V70ruRzEGOI]

and for the hard-core Angry birds lovers – here is a new AB theme we’ve built to keep you happy on each new tab you open.

Have a great week.

Psss…. you can get the theme that is ‘just right’ for your screen:

  • Resolution 1024×768 –  http://goo.gl/NeeiG (If you are on a Netbook or any other small display – go for it)
  • Resolution 1680×1050 – http://goo.gl/N04uU (Prefect to  Buy MacBook Pro)
  • Resolution 1920×1080 – http://goo.gl/Sa6CQ (Best for your office/home large screen)
Standard